How To:
Install Casement Window Screens
Before You Begin
Find out what kind of window you have. The required steps for replacing your window screen will change depending on the type you have. This is also true for the type of screen you have.
These are the materials and tools that will be required to install your window.
Materials
- Screen Frame
- Screen cloth (aluminum or fiberglass)
- Screen retainer spline
- Plastic Corners
Tools
- Hacksaw
- Box Cutter
- Tape Measure
- Screening Tool
Before you begin cutting the screens to size, take a quick look at your window and see if they match any of the images below. If your window matches the image for a casement window, continue reading; however, if it's a sliding window or a double hung wood window:
Click on the button below the image of the window that looks like yours. You will be taken to the corresponding instruction manual page.
Casement Windows Screen Installation
Step 1: Measure the Screen
Casement windows typically use screens mounted on the inside and secured in place using casement clip fasteners. Measure the width of the screens between the casement clip mounting holes (see image to the left).
Measure the height from the top of the crank mechanism to the bottom edge of the upper window frame and add 1/4" (see the image to the left).
Step 2: Cut the Frame
Measure the existing screen or screen location. Deduct 1-1/2" from each measurement, then square cut the frame with a hacksaw (we recommend a fine-tooth hacksaw). When the corners are installed (Step 3), they will fill the overall dimension requirements.

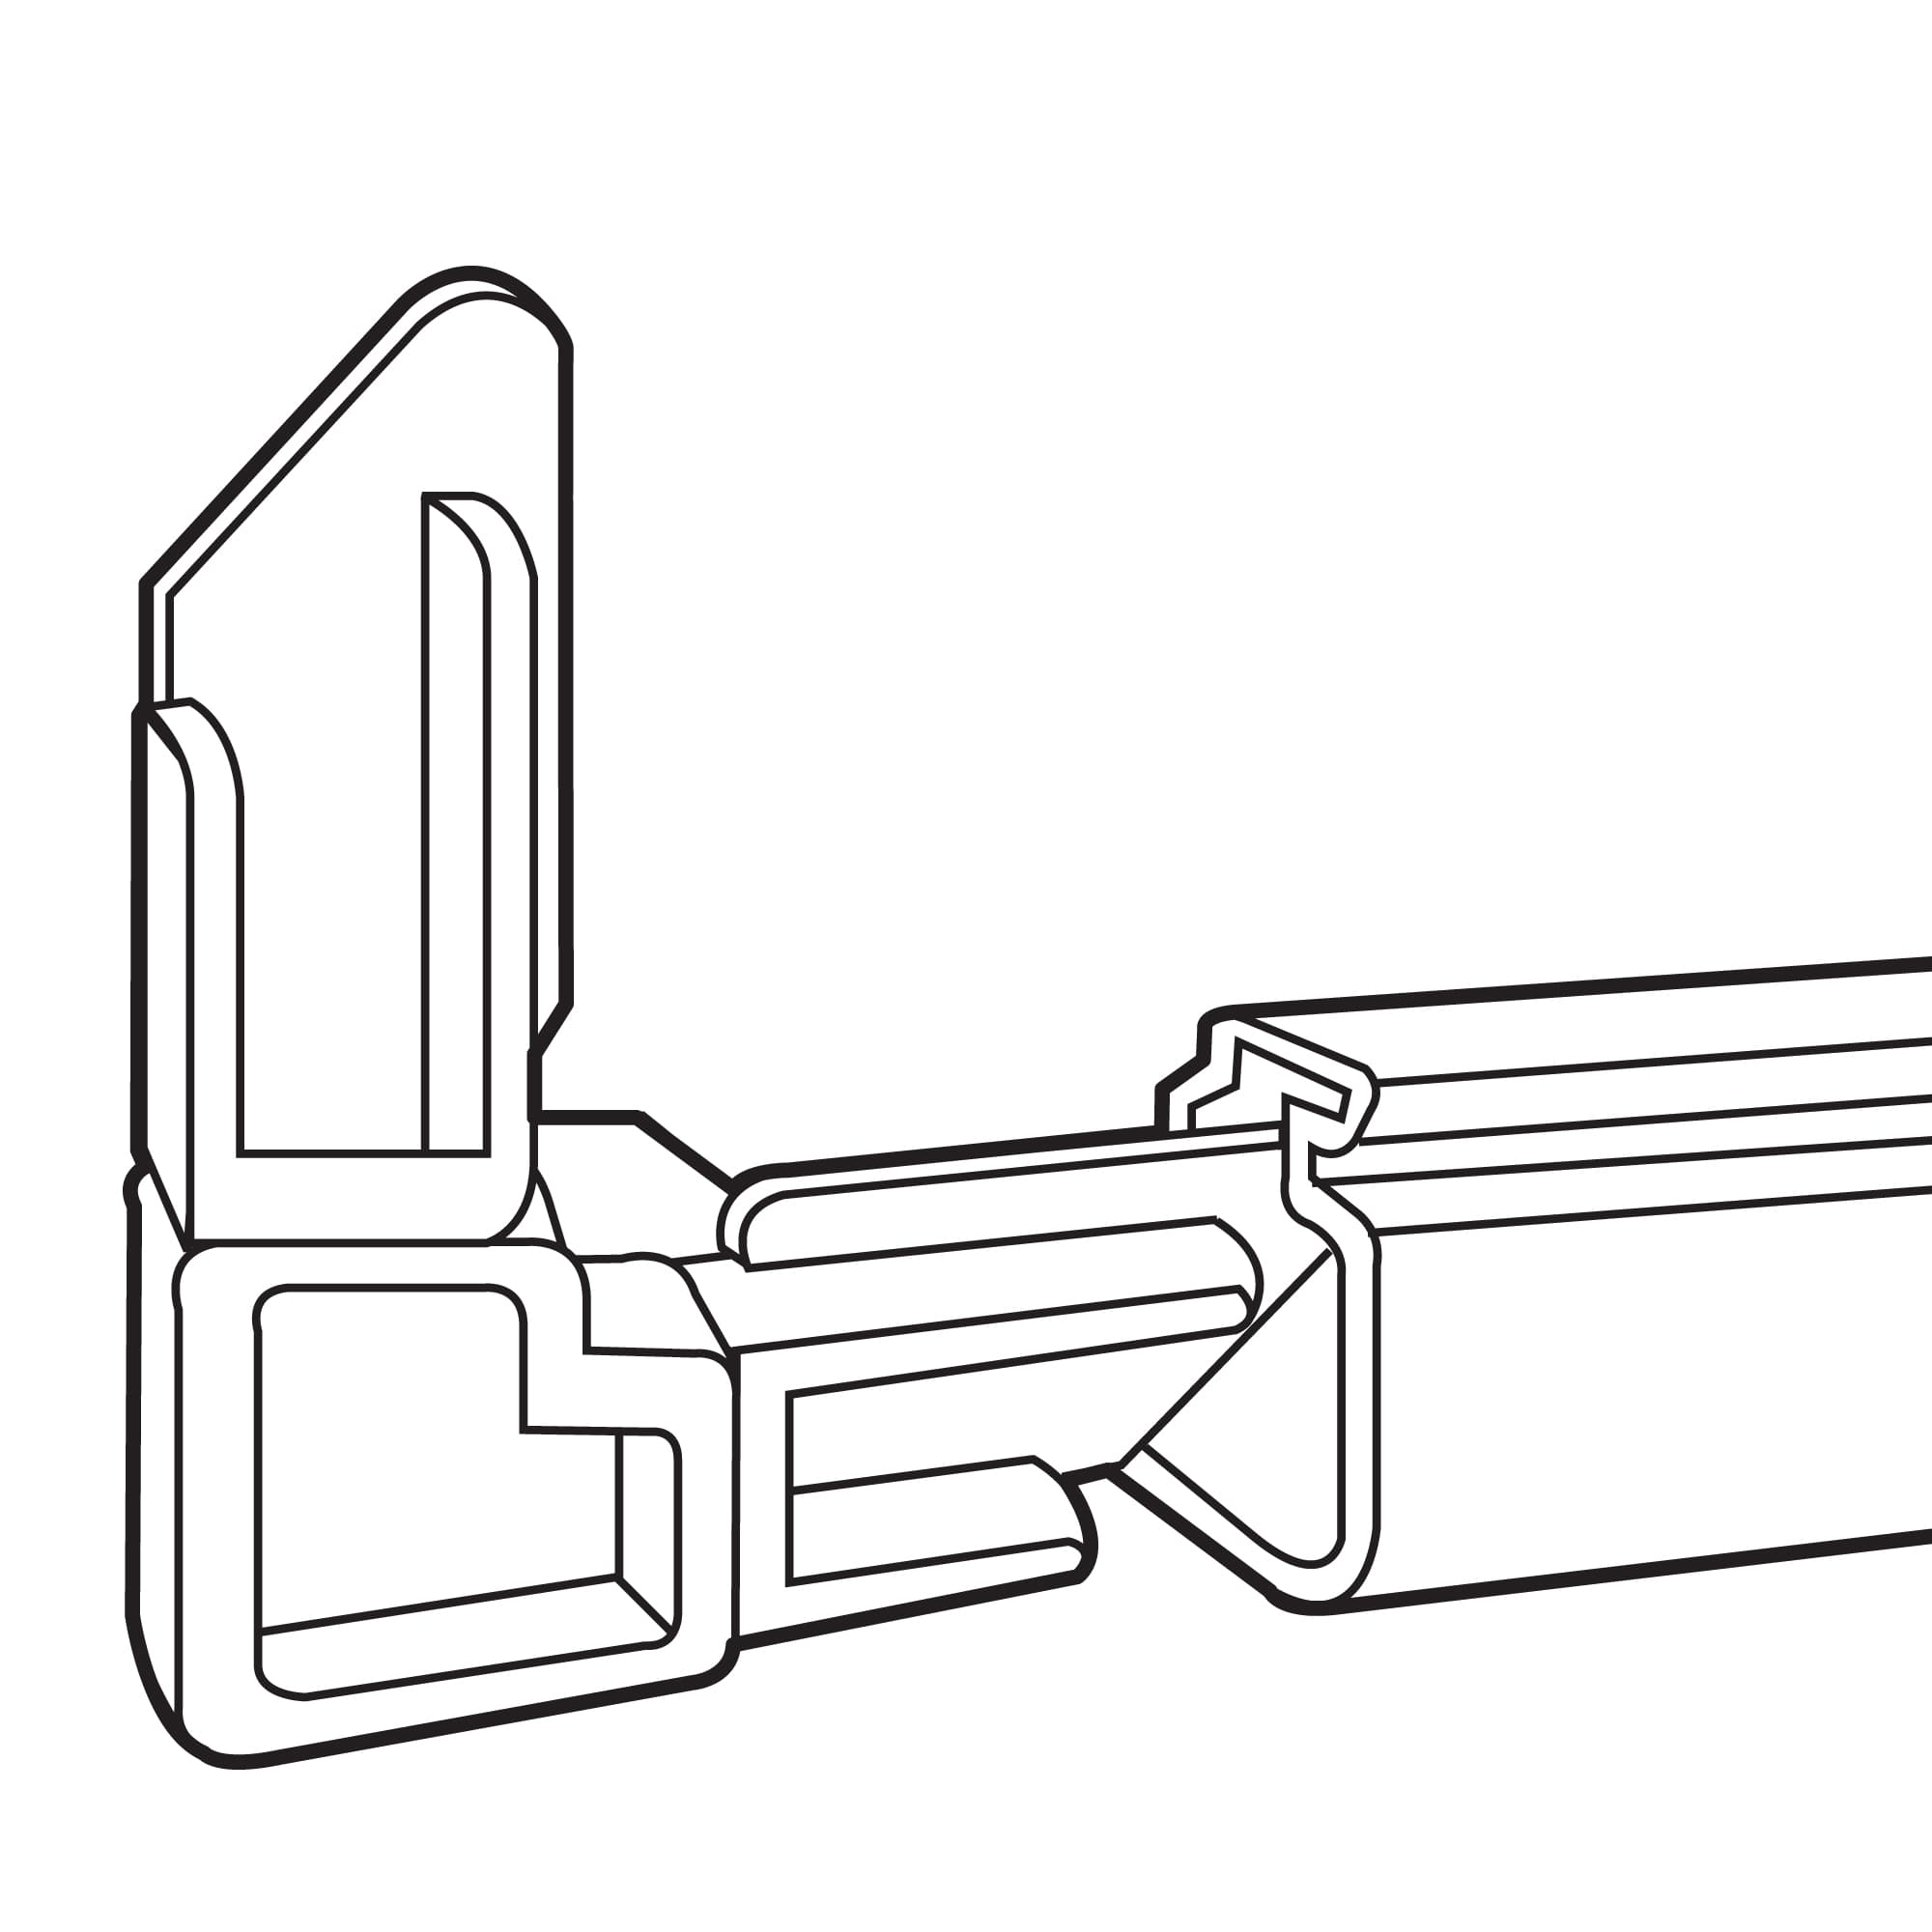
Step 3: Assemble the Frame
Insert the corners into the short lengths first, then insert the exposed corner leg into the long lengths. Lightly tap the corners into place. Check the assembled frame for squareness.
Step 4: Screen Installation
How you install your screen will depend on the type of screen you have. We will go over the installation of a fiberglass screen and an aluminum screen.

Fiberglass Screen
1. Lay the assembled frame on the flat surface with a retainer spline channel facing up.
2. Place the screen cloth over the frame, overlapping the retainer spline channel at least 1" on all sides.
3. Begin at one corner and insert the screening (use a convex or concave wheel) into the channel with retainer spline (press down and roll with short back-and-forth strokes). Cut off excess retainer spline.
4. With a sharp knife, cut off the excess screen cloth by angling the knife blade on the outer edge of the spline, being careful not to cut the screen.
Aluminum Screen
1. Place the screen wire over the frame, overlapping the retainer spline channel 3/8" on all four sides. Cut the screen wire across the outside corner of the spline channel at a 45 degree angle.
2. Hold the screen wire firmly in place and, using short light strokes, insert the screening (use a convex wheel) into the retainer spline channel of the bottom frame section. Use a free hand to press down firmly on the screen in the center of the assembled screen frame. This will assist in eliminating the screening from being pulled too tight. Duplicate this procedure at the top of the frame, followed by the two sides. Be sure the screening is completely compressed into the channel (use a concave wheel), before inserting a retainer spline.
3. After rolling in all sides, begin at one corner and insert the retainer spline (use a concave wheel) into the channel (press down and roll with short, back-and-forth strokes). Trim the loose wire strands and excess retainer.
Step 5: Install the Finished Screen
Place the finished screen frame into the window frame.
Your screen is now installed, and your window is ready to be used.