How to:
Install a Door Viewer
Before You Begin
Make sure to keep your door open when installing your door viewer so you have easy access to both the inside and outside parts of the door.
Don't forget to take into account the height of everyone living in your home. If the door viewer is too high,
How To Install A Giant Door Viewer
How To Install A Giant Door Viewer
Learn how to install Prime-Line's Giant Screen Door Viewer and improve your home's safety and security.
Step 1.
Measure and bore a hole through your door.
NOTE: Make sure to double-check the height of the hole so it's easily accessible to everyone.
Step 2.
Insert the front lens in the hole you made on the front of the door. It should rest against the door itself.
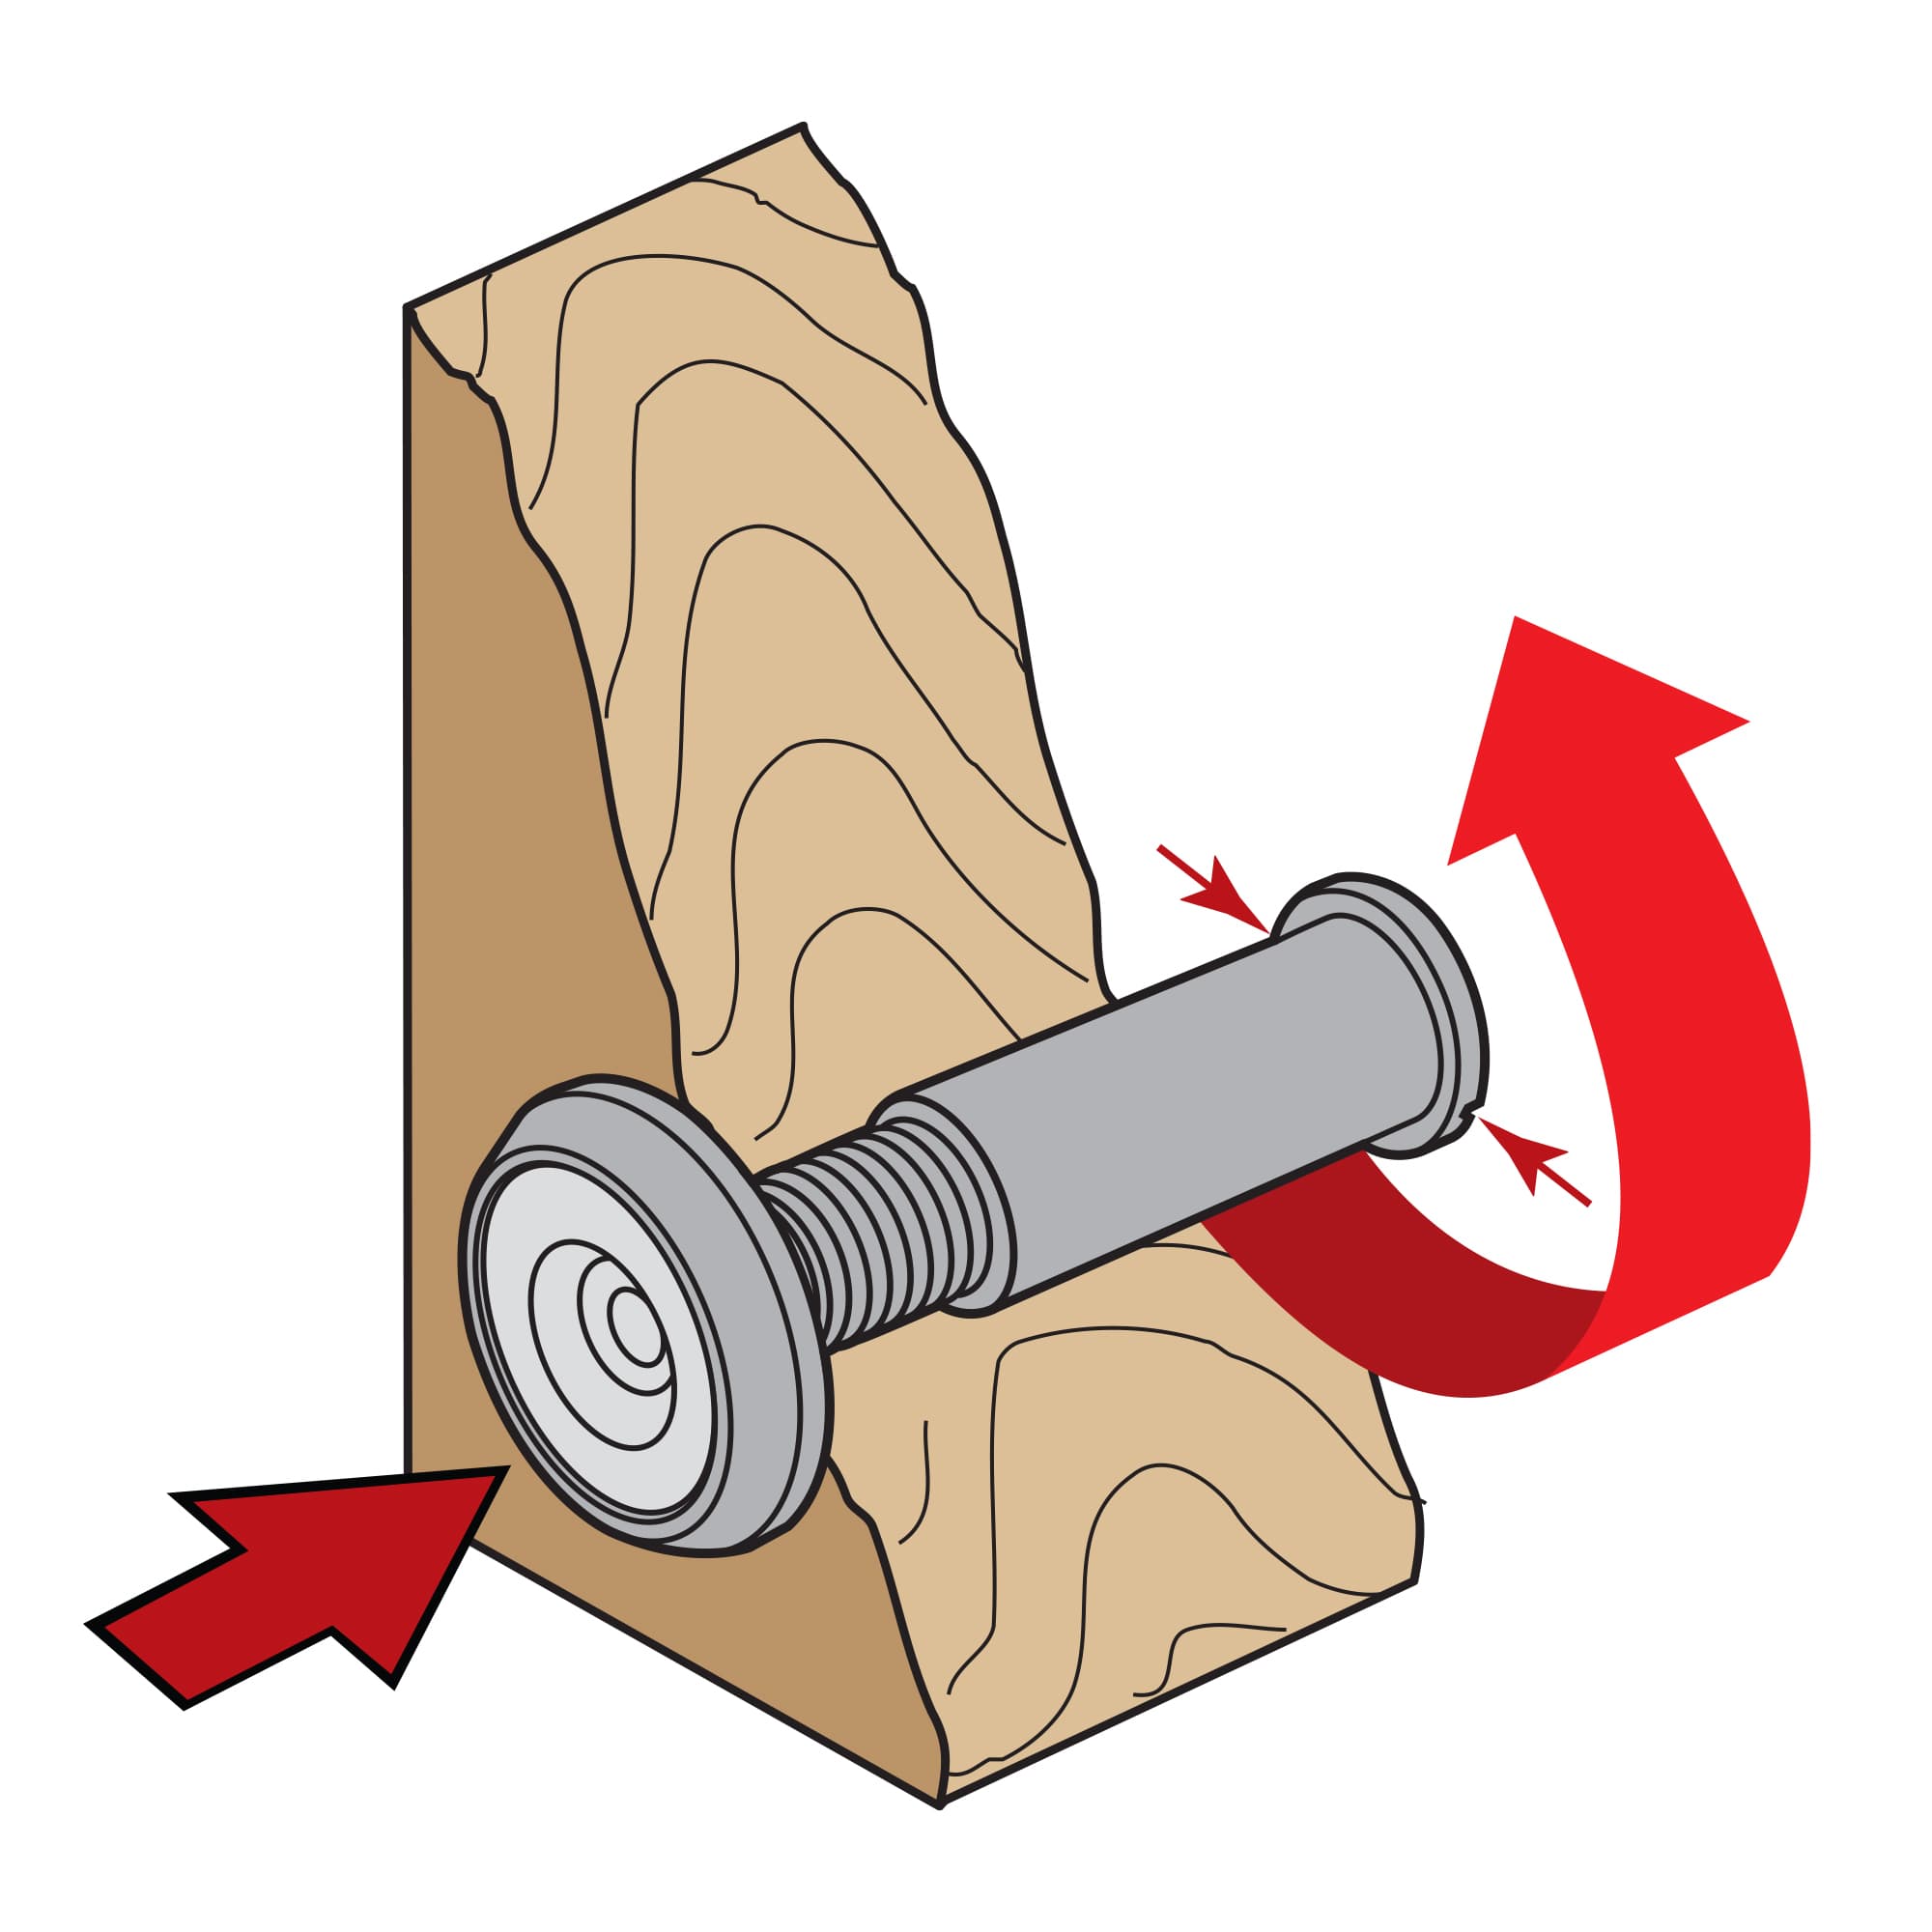
Step 3.
Next, slide the viewing tube into the hole on the inside part of the door. It should fit into the outside tube. Rotate the tube to screw the viewing tube (the one installed on the inside portion of the door) into the outside portion. Continue until the back of the tube is seated against the door.
Step 4.
Use a flat head screwdriver to tighten the tube against the door, using the notches / cutouts on the sides of the back of the viewing tube against the door.
Step 5.
Look through to ensure everything is clear and working properly. Double check the tightness of the viewer; if it's still too loose, use the screwdriver to carefully tighten the viewer.
Your door viewer is now installed and ready to be used.